Posted: 28 Sep 2005
Applies To:
- SUSE Linux 10.0
- Novell Client 1.0 for Linux
Disclaimer
This solution is NOT supported in any way by
Novell. It was compiled by solutions sent in by the community. This is
considered a hack for those who wish to have the Novell Client for Linux working
on SUSE Linux 10.0. In other words, here it is, but you are on your own.
Have fun.
Installation
- Download
the binhack-1-1.i586.rpm that a
community member put together for SUSE Linux 10.0. This puts an older version
of the libbfd-2.15.94.0.2.2.so (from
SUSE LINUX Professional 9.3) in the /opt/novell/xtier/lib directory and also
takes care of dependency problems in Yast.
Note: If the file is
not available then you will need to follow the supplementary section in this
document before moving on to step 2, but only follow the supplementary section
if the file is NOT available. This will walk you though the process manually.
If you perform the manual process, you will also have Yast dependencies that
you will need to ignore.
- Open a terminal change directories to the location where you downloaded
the binhack-1-1.i586.rpm package. To
install the package you will need to su
to root and then type rpm -ivh
binhack-1-1.i586.rpm.

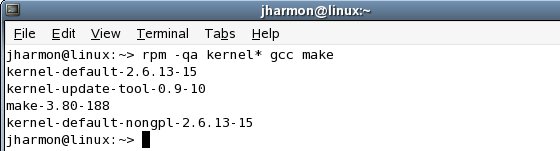
- Check to see if your workstation has been properly prepared by typing
rpm -qa kernel* gcc make and then
hit enter. You should see a list that includes a kernel-smp or kernel-default
(depending on whether you are have a single or multi processor). In my
example I have the kernel-default and make packages installed. You can see
from the query that I do not have the kernel-source or gcc installed, so I
will need to install them.
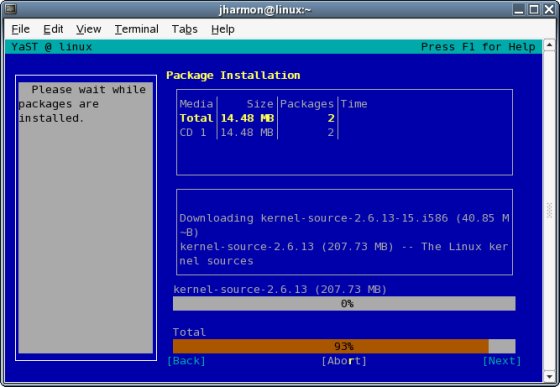
- To install these packages you can use the yast -i command. You need to be root to use
this command, so within the same terminal window, type su and hit enter. Put in roots password when
prompted and hit enter. Then type in the command yast -i kernel-source gcc and hit
enter.

- Yast should then install these packages.
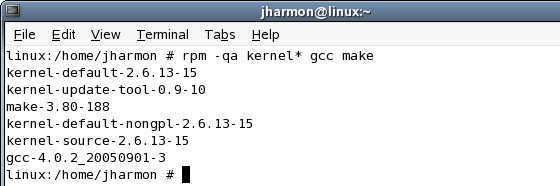
- Once the installation is complete, run the rpm -qa kernel* gcc make command again. You
should now see that you have your kernel-source, gcc, and make packages
installed.
Critical: Your
kernel-source version number must be the same as your kernel (default or smp)
package. If it is older then you will need to launch yast and run an online
update to get it to the same level.
- Download
the Novell Client for Linux for SUSE LINUX Professional 9.3 and extract it to
a temporary location. When extracted it should create a directory named NCL_DISK.

- At the root of the NCL_DISK directory you will find a file called ncl_install. Be sure that you su to root if you have not already done so.
Launch the installation by typing ./ncl_install within the terminal. Note: You may receive
some warnings during the installation but it should still install just
fine.
- Reboot so that the novfs kernel module can properly initialize.
Supplementary
Important: STOP! You only need to perform this section if
the file in step one is not available. This whole process needs to take the
place of step one and then after completing it you can move on to step two.
However doing this manual process will cause dependency problem in
yast.
- Download the binutils
rpm for SUSE LINUX Professional 9.3. Open the rpm package with an
extraction utility (like file-roller or ark). These can be found under your
Utilities > Archiving menu. Extract
the libbfd-2.15.94.0.2.2.so file to a
temporary location.
- Open a terminal and su to root and
enter in root's password.
- Change to the / directory and then
create the following directory: /opt/novell/xtier/lib
# cd /
# md /opt/novell/xtier/li |
- Copy the libbfd-2.15.94.0.2.2.so file to the /opt/novell/xtier/lib directory.
# cp /home/jharmon/libbfd-2.15.94.0.2.2.so /opt/novell/xtier/lib |
- Download
the Novell Client for Linux which was built for SUSE LINUX Professional 9.3
and extract it to a temporary location. When extracted it should create a
directory named NCL_DISK.
- Within a terminal, change to the /NCL_DISK/novell/i586 directory. Manually
install the novell-xtier-base-3.1.2-8-suse93.i586.rpm
package by typing rpm -ivh --nodeps
novell-xtier-base-3.1.2-8-suse93.i586.rpm.
Note: You should still be
in as root if you are using the same terminal session as before. If not then
be sure you su to root before installing the rpm.
# cd NCL_DISK/novell/i586
# rpm -ivh --nodeps novell-xtier-base-3.1.2-8-suse93.i586.rpm |
- Continue on with Step 2 under the section titled Installation.
|