| OpenOffice.org 2.0: Creating a Table of Contents 
Scott M. Morris
Introduction
One of the software suites that have helped people shift from Windows to
Linux is OpenOffice.org. It is a well-rounded, fully-featured office suite
providing, word processing, spreadsheets, presentation software, and a database
program. The word processing part, called Writer, is what we'll look at
today.
In longer documents, navigation can be difficult. It is also easy to lose
your place or get lost. One thing that really helps address this issue for you
readers is if you can create for them a table of contents. In OpenOffice,
creating such a reference for readers is quite simple. Let's take a look at how
this is done.
Install OpenOffice.org and run Writer
First, let's make sure you have it installed. Most of the time, it will
already be installed, but let's just make sure. Open up YAST, go into SOFTWARE
MANAGEMENT, and search for the package called openoffice_org. When it comes up in the right pane, make
sure that the checkbox next to it is ticked. Then, click ACCEPT: 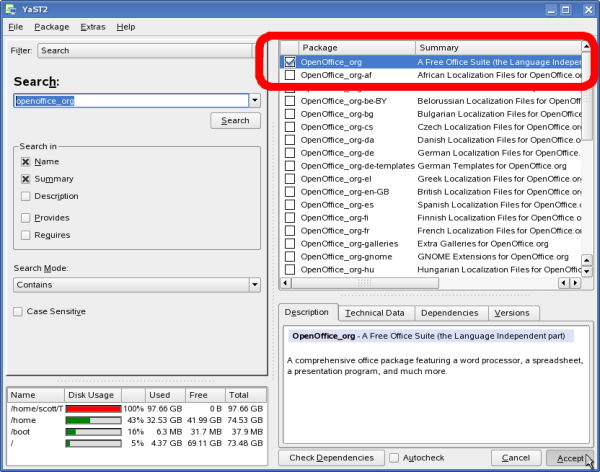
YAST may ask you for some CDs as it installs the software.
Next, we will run it.
For KDE users, follow this path:
For Gnome users, follow this path:
You should see the main window appear, which looks something like
this: 
Creating the Table of Contents
Let's type in some paragraphs and headings that we can work with. These
headings will be what appears in the table of contents. In your blank Writer
document, type "Heading Number One" and then press Enter. On the next line, type
"This is a paragraph that explains, in detail, everything about Header Number
One." and then press Enter. Next, type "Heading Number Two" and press Enter. On
the next line, type "This is a paragraph that explains, in detail, everything
about Header Number Two." You should how have a document that looks something
like this: 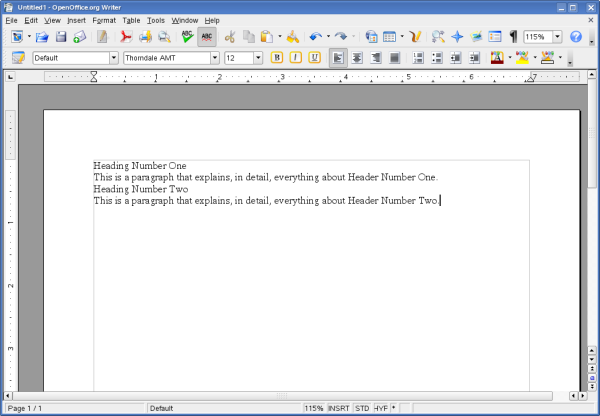
Next, we will need to bring up the "Styles and Formatting" window by pressing
F11: 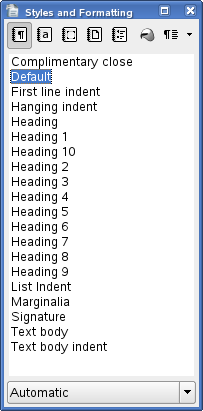
What we are going to do here is apply formatting to the headings so that
OpenOffice knows where they are. This makes it easy for OpenOffice to generate
the Table of Contents. Click on the line in your document that says "Heading
Number One". Then, in the Styles and Formatting window, double-click the
"Heading 1" entry. You will see the line change in your document: 
Let's do the same thing for the line that says "Heading Number Two". Click on
that line in your document. Then, double-click the "Heading 1" line in the
Styles and Formatting window. Your heading will change: 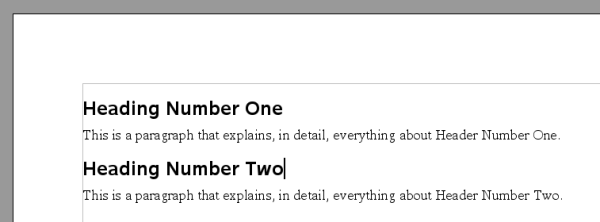
We are now ready to put in the Table of Contents. Put your cursor at the very
beginning of the document, to the far left of the words "Heading Number One."
You can do this by pressing CTRL + HOME on your keyboard.
Click on the INSERT menu, go down to INDEXES AND TABLES, and then select
INDEXES AND TABLES: 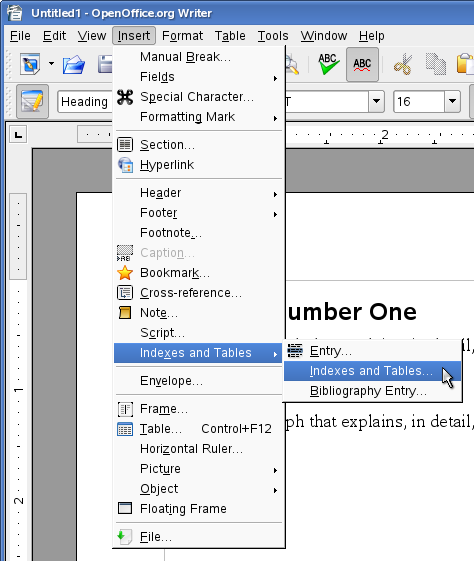
You will see a window appear asking you to set some preferences for your
table. Most often, you can just click OK: 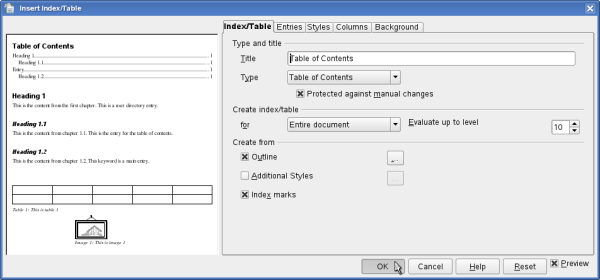
Back in your OpenOffice document, you will see the Table of Contents
appear: 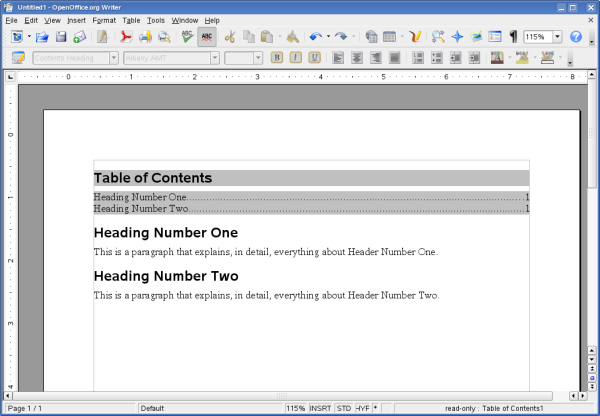
Notice at the far right that the page numbers appear for which page each
heading is located.
You can also do this if you need subheadings. You just apply "Heading 2" from
the Styles and Formatting window to any subheadings you wish to create.
You will notice, as you are working on your document, that the Table of
Contents does not automatically update itself. Doing this manually is a snap.
Simply right-click on the Table of Contents. A small menu appears. Select
"Update Index/Table" from this menu: 
Any time you add new headings, edit the text of a heading, or remove a
heading, you can update your Table of Contents in this manner. You will notice
that the subheadings will be slightly indented in your Table of
Contents: 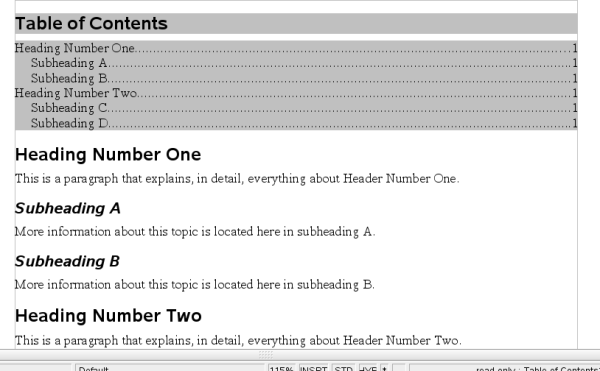
Conclusion
In this short example, everything is on page one. However, if you have more
than 20 pages, it is helpful to tell the reader where things are. You can do
this by implementing a simple Table of Contents, as demonstrated above.
More information can be found here: http://www.tutorialsforopenoffice.org/tutorial/Create_and_Modify_A_Table_of_Contents.html
| 


