Posted: 6 Apr 2005
If you are an administrator, you probably oversee a network. On your network,
you may have several machines running SUSE, Novell Linux Desktop, and/or SUSE
Linux Enterprise Server. If this is the case, you know what it's like installing
software from CDs onto all those machines. One of the things that you might wish
to consider is how to most easily install packages onto each of the machines. Before we start, let's review what is going to take place. First, we are
going to create a repository directory on a machine that will act as an NFS
Server to the network. You will put the contents on each of your installation
CDs into this repository. You will then export this folder via NFS. On each of
the client machines, you will set up an NFS Installtion Source in YAST that will
use this repository.
Please take note that I am doing this in KDE. If you do it in Gnome, know
that it will be similar in concept, but will not be exactly the same. In all
reality, there are several factors here that may change how this is done.
Depending on your situation, adapt this guide to fit your needs.
Create the Repository
First, let's make a folder to use as the repository. Open your 'home' folder
in Konqueror:
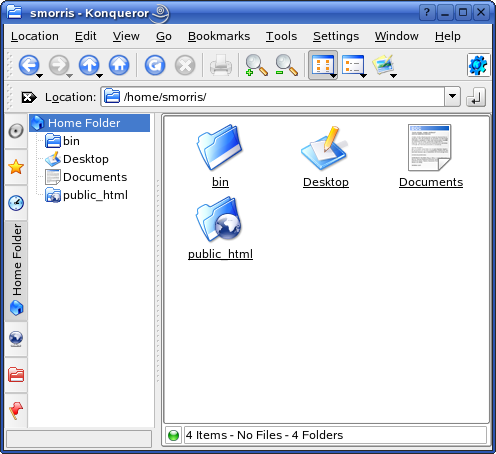
Right-click out in the white space. Select CREATE NEW, and then FOLDER:
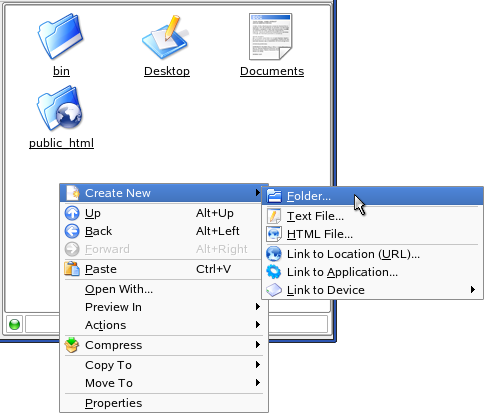
Name the folder slp93, and click OK:

Now, you need to make subfolders for each of the five installation CDs.
Go into the slp93 folder. Right-click out in the
white space. Select CREATE NEW, and then FOLDER:

Name the folder CD1, and click OK:

Make folders for the rest of the CDs. Name them CD2, CD3, CD4, and CD5:
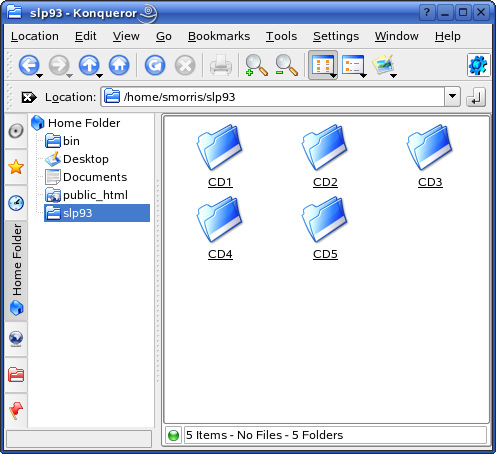
Leave this window open. Now, we have to copy the contents of the CDs to each
of these folders. Go ahead and put the first CD into your drive. Cancel anything
that pops up.
Open up a new Konqueror window and browse to /media:
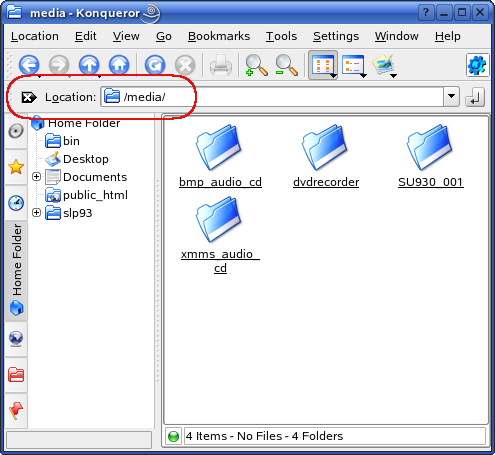
Go into the folder of your CD drive. Mine is called 'SU930_001.' Yours might
also be 'dvdrecorder,' 'cdrecorder,' or 'cdrom:'
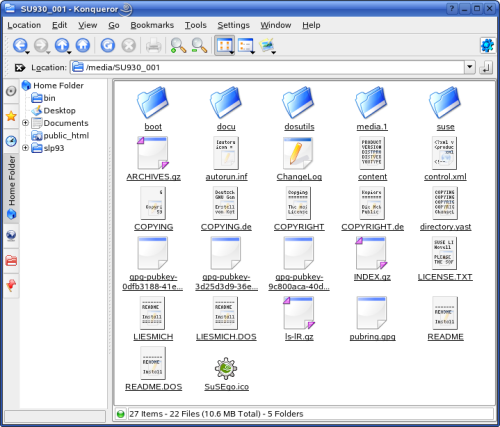
In your other window, go into the CD1 folder:
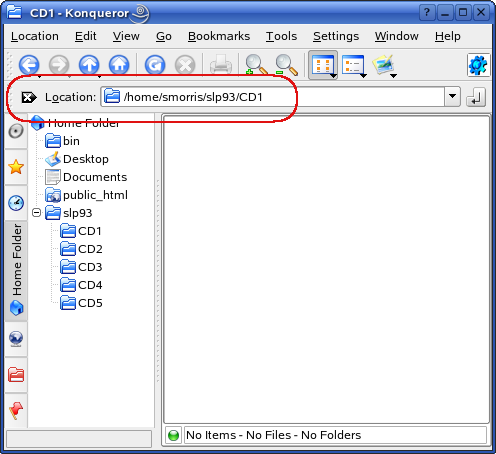
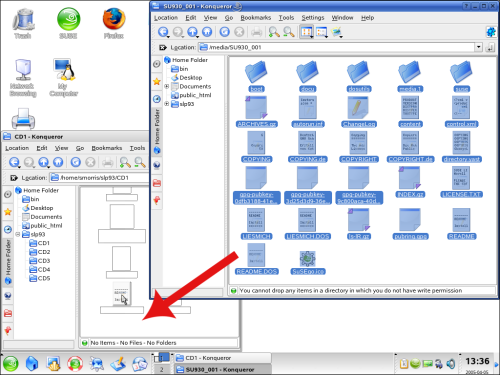
Drag everything from the CD over to the CD1 folder:
When the small menu appears, click COPY HERE:
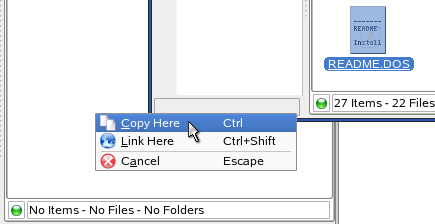
When it's finished copying, eject the CD. Put in the second CD. Copy its
contents to the CD2 folder.
Repeat these steps with each CD, until you have copied the contents of every
CD to its corresponding folder.
Finally, we are finished creating the repository. Next, we'll export these
folders from an NFS Server.
Configure the NFS Server
Open YAST. On the left, select NETWORK SERVICES. On the right, select NFS
SERVER:
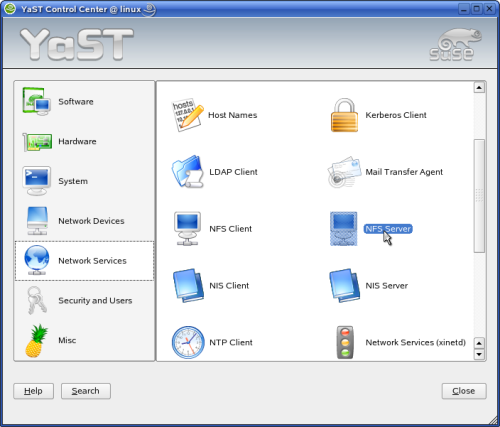
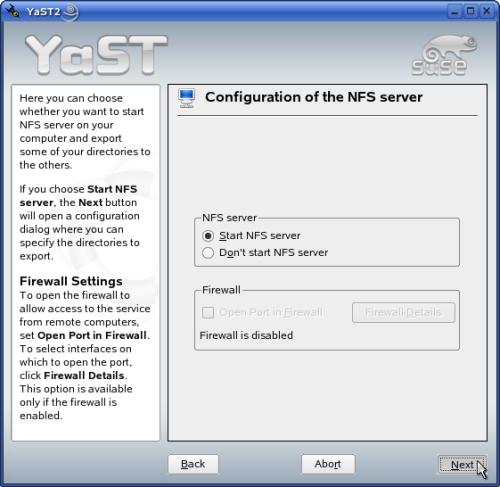
When the "Configuration of the NFS Server" window comes up, make sure "Start
NFS Server" is selected. If you have a firewall, be sure to open a port for the
NFS Server. Click NEXT:
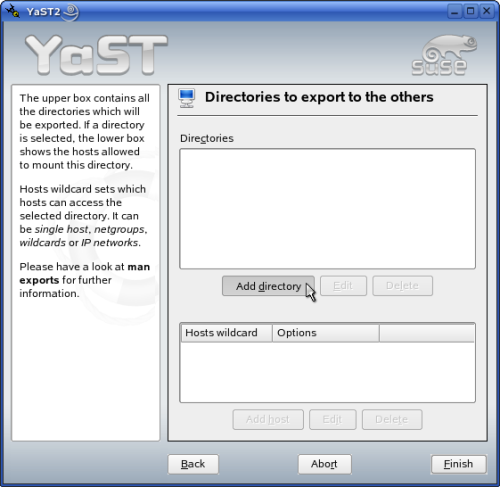
In the next window, click ADD DIRECTORY:
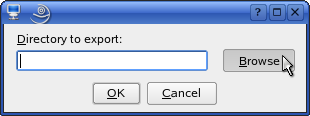
A small window appears. Click BROWSE:
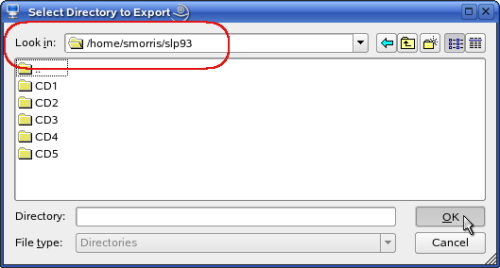
Browse to your home directory. It will be something like /home/smorris where 'smorris' is your username. Then go into
the slp93 folder. Your LOOK IN box should say /home/smorris/slp93, where 'smorris' is your username. Click
OK to continue:
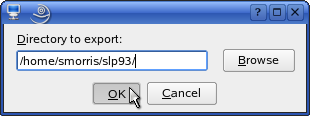
Click OK again on the smaller window to continue:
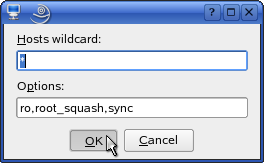
You are presented with a box to specify Hosts and options for your NFS
Server. In most cases, unless you have other settings to put here, you can just
click OK:
Once back in the main YAST window, click FINISH:

YAST then loads your new settings and starts up the NFS Server. The NFS
Server is good to go. Now we need to set up our client machines to use it.
Configure the Client Machines
Go over to another machine on the network. Open YAST. From the left, select
SOFTWARE. From the right, select CHANGE SOURCE OF INSTALLATION:

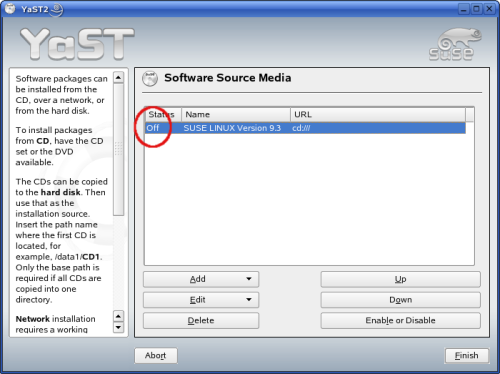
Another window appears, called "Software Source Media." In this window,
select the current install source (probably pointing to a CD-ROM), and click
ENABLE OR DISABLE. The STATUS column should change to OFF:
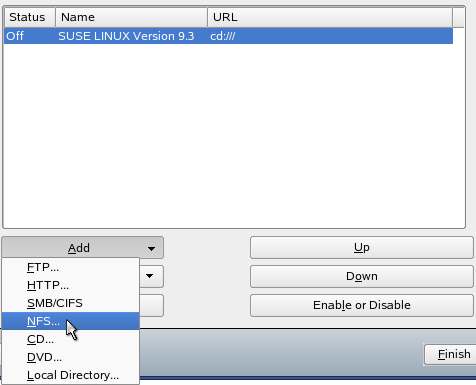
Next, we'll add the new installation source. Click the ADD button, and select
NFS:
Another window appears asking for the server and the directory. In the SERVER
NAME box, put in the IP address of the machine containing the repository and NFS
Server. In the DIRECTORY ON SERVER box, type /home/smorris/slp93/CD1, substituting 'smorris' for your
username. When finished, click OK:

YAST then verifies that the installation source provided is valid.
If it is not valid, it will display an error that says that there is no
installation source found in the location provided.
If it is a valid installation source, it will appear in the list:

You have now added the first CD as an installation source. Add the rest of
the CDs in the same manner. Instead of putting in CD1
as the folder every time, you will specify CD2, CD3, and so on for each CD. For CDs 2 through 5, you may be
prompted with a box that looks like this:
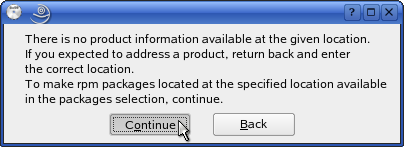
If such a box appears, it is okay to click CONTINUE.
When you have all of the CD locations added, click FINISH:

Next, we'll test the configuration to make sure everything works.
Test the Configuration
Finally, it's a good idea to test the setup. Open YAST on the configured
client machine. Select SOFTWARE from the left pane, and INSTALL AND REMOVE
SOFTWARE from the pane on the right:

Another window appears. We need to install something to test our installation
source. For our example, we'll install 'Maelstrom,' an Asteroids clone. However,
it could be any package you wish to use. Type 'maelstrom' into the SEARCH box,
then click the SEARCH button:

Check the box to tell YAST to install it, and then click ACCEPT to
proceed:

If you are prompted for a CD or an error occurs, something has been
misconfigured. Go back and check each step for accuracy. If YAST is able to
proceed and install the package, you can rest assured that it is working
properly.
Conclusion
Sometimes, it is nice to have one central repository that you can use as a
YAST package installation source. This way, you don't have to worry about wear
and tear on your CDs. You don't even have to deal with the CDs, except to create
the initial repository.
Although this guide was created using SUSE LINUX Professional 9.3, you can
mix and match operating systems. You can put a Novell Linux Desktop repository
on a SUSE LINUX Enterprise Server machine. Or, you can put a SUSE LINUX
Enterprise Server repository on a SUSE LINUX Professional 9.2 machine. As long
as you put the correct repository in as an installation source on the proper
client machine, it should work like a charm. It's a nice time-saver, especially
if you have a large number of client machines on your network.
|