| What Is Logical Volume Management? |
Posted: 27 Apr 2005
the problemThe times we are now living in allow us to store large
amounts of media on our computers for easy access.
When the amount of
media I had grew larger than my hard drive, I knew I needed a new hard drive,
but some problems kept creeping up when I envisioned how I was going to use
it:
- If I bought a new hard drive in addition to the one I already had, I would
have to mount it in a new directory, thus creating two directories containing
the same type of media.
- example: my movies directory was /movies. Adding another hard drive
would cause another mount directory to have to be created, like /movies2 or
something similar. This would create all sorts of problems with organizing
my movies.
- I could buy a much bigger hard drive, copy all my media to the new one and
erase the old one. This is quite a hassle - and what happens when the media
outgrows the new hard drive? And what about the space on the old hard drive?
None of these solutions provided any security of future expansion
without a major headache of juggling hard drives around.
When I found
Logical Volume Managment (LVM2), I saw exactly what I needed to solve this
problem.
the solutionLogical Volume Management allows single or multiple hard
drives to be grouped together into a single "volume group" that can be easily
expanded.
When you run out of space, you simply plug a new hard drive
into your computer, run a simple configuration program, and you've got more hard
drive space in the proper directories.
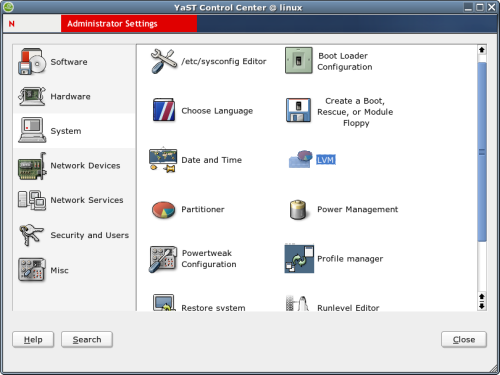
setting it upTo begin, open YAST.
Once YAST is open, click on
System on the left-hand nav, and then click on LVM in the
right-hand content menu.
If
this is your first time using LVM, you'll be prompted to install the appropriate
software.
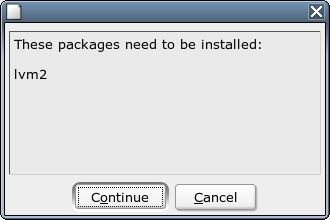
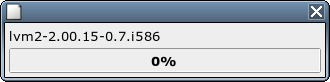
Click
on "OK" and wait for the software to be installed.
Once
it's installed, you'll see the following menu appear.

You
can set the Volume Group Name to anything you want. The default "System" is good
enough in most cases. I decided to set mine to "test".
When you click
"OK", the following menu will appear.

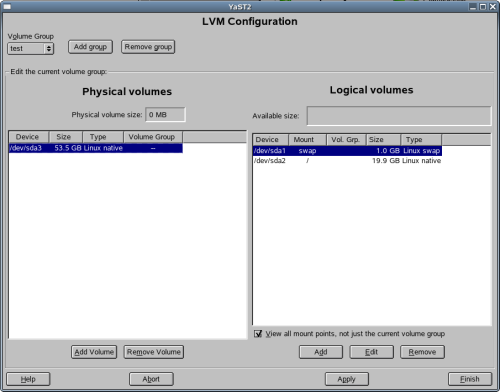
This
menu is the controller for your Logical Volumes. Before we continue, some
explanation is in order.
Here's some definitions that might help you.
- Volume Group - A name given to the logical equivalent of a
non-partitioned hard drive.
- Physical Volumes - Actual hard drives or hard drive partitions.
- Logical Volumes - A name given to the logical equivalent of hard
drive partitions.
If that is confusing, just think of the volume group
as your hard drive, and the logical volumes as your partitions.
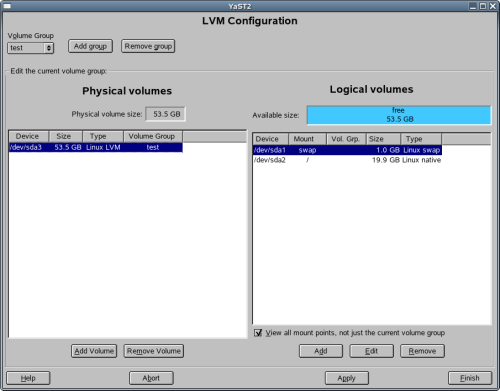
Now, if
you notice, there isn't anything in my Physical Volumes list. This means there
are currently no hard drives, or hard drive partitions which are
available.
To continue, I had to free up some space, so I went and
unmounted an un-used partition on my drive. If you don't have any that are
un-used, the best option is probably to go and get another hard drive and put it
in.
*note* - If you unmount a drive or partition, make sure the
data on it can be erased because the following steps will erase the data
on the unmounted space.
Once you have some freed up space, run the LVM
console again, and you should see something appear in the Physical Volumes
list.
From
here, simply click on the physical volume you wish to add (in my case, it is
/dev/sda3), and then click the "Add Volume" button below the Physical Volumes
list.
The physical volume will instantly be added to the volume group,
and you'll have some newly available space, as you can see below.
To
use this space, click on the "Add" button below the Logical Volumes list. A new
window will pop open.
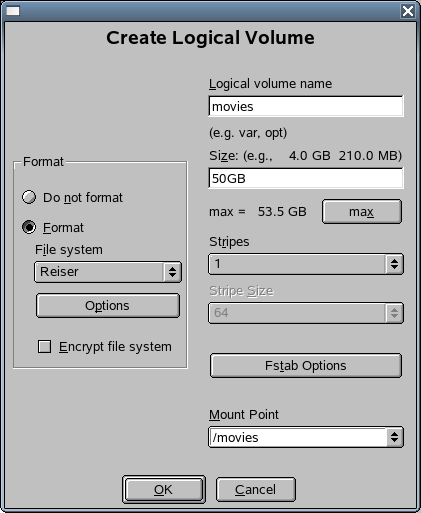
The
name can be anything you want. You can also choose how large you want the drive
to be. If you want to use the maximum available space, simply click the "max"
button. Next, make sure you choose the appropriate mount point. I just typed in
"/movies" for mine. If everything else looks good, click "OK"
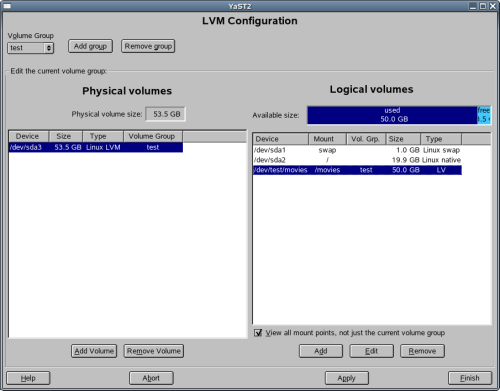
As
you can see, a new logical drive appeared in the list. The new node is
"/dev/test/movies", the mount point is "/movies", and it has 50 gigabytes
available to use.
If you're done creating logical drives, click
"Finish".
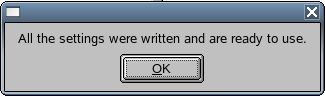
And
you're done!
Just to make sure everything was really "done", I opened up
a console and typed "df -h" to see what space was available on my drives. I was
pleased to see a new 50 gig partition appear.

adding more space to an existing LV driveWhat if you run out of space
on your LV drive? No worries. Simply add some more.
Using the previous
set-up, I opened the LVM console and noticed that I have 3.5 gigabytes being
un-used.

So,
I clicked the "Edit" button under the logical volumes list with the appropriate
logical volume selected. A new window popped up

I
changed the size of the drive from 50.00 GB to 53.5 GB by clicking the "max"
button. If you've added a new hard drive to the volume group, you can either
click the "max" button, or manually type in what size you want the drive to
be.
When you're done, click OK.
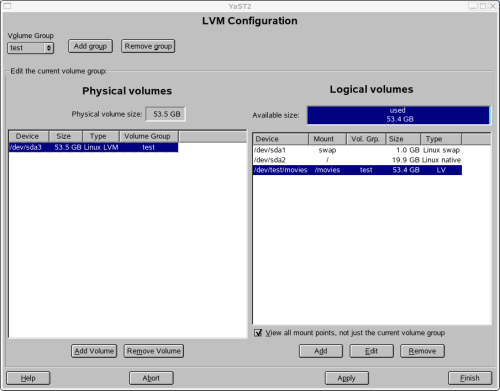
You'll
now notice there are 53.5 gigabytes available. When everything is looking good,
click "Finish", and your logical volume will magically be resized.
To
verify this, I typed in the "df -h" command to see if the volume had any more
space allocated.
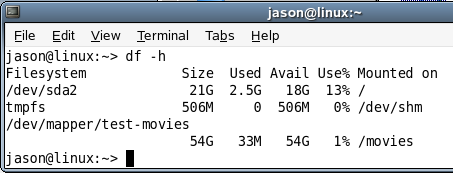
As
you can see, the drive grew from 50 gigabytes to 54 gigabytes.
So now,
when my /movies drive fills up, I can simply add another hard drive to my
computer, open up the LVM manager, add the drive to the volume group, expand the
size of my logical volume, and I'll have as much space as I need magically added
to the appropriate directory.
Problem solved.
|
| |