Posted: 29 Apr 2005
Before you start...you must have signed up with an Internet Service
Provider. They will give you:
- a phone number for your Modem to dial to make the connection
- a user name to log into your account
- a password so no one else can use your account
- an address to collect incoming email
- an address to send outgoing email
Joining up the cables
Before plugging anything apart from a USB cable into a PC, make sure the
PC is switched off and the power cable is detached.
- RS 232 external Modems available in Australia come with three cables. One
is the power supply which needs to be plugged into a power socket and the
Modem, another is the phone connector cable, which goes into the phone wall
socket and the Modem, and the last the RS 232 data cable which goes from the
Modem to the computer.
- Before you do anything, make sure that you can plug the telephone cable
into your phone socket. Some phone sockets take a plug with 2 or 3 large pins,
and some have a small plug that goes into a small square hole. You may have to
buy an extension cable from a store like Tandy to reach your computer.
- Also you can purchase a double adapter plug with two sockets to suit your
phone and your Modem cable.
- The other end of the cable goes into the Modem. Sometime there are two
sockets, one called phone and one called line. Plug the cable into line. You
may be able to plug a phone into the one called phone, so you can have one at
your computer station.
Remember that you can only use one at a time. Either the phone or the
Internet Modem.
Now that this bit is set up, switch off the PC and detach the power cable.
Find the RS 232 data cable. This is a cable with connectors that look like this
picture when you look at the pins or holes. 
Sometimes the cable has one connector on one end and two connectors on the
other, a DB-9 and a DB-25. Usually the single end will be a DB-9. In any case it
is the one with the pins, as your Modem will have a socket with holes for this
plug to go into. Plug it in and tighten the turn screws if supplied.
The computer end of this cable will be a socket with holes. Choose the DB-9
size and find a matching plug with pins on the back of the computer. There are
usually two of these. Either one will do although if they are labelled 1 and 2,
choose 1.
Put the Modem power cable into the Modem and plug the other end into a power
socket. Turn on the Modem power switch, which is often small and hidden at the
back of the unit. You should see lights somewhere on the front of the unit.
Now plug your computer power back in and switch it on. Your Modem is ready
for your software to connect to the Internet.
Software connection
If you are lucky enough to be using SuSE 9.2 you can use YaST to configure
your Internet connection and kinternet to make the connection.
You can set the Modem up to automatically dial when you open your browser,
but I think that this is a security risk as any virus on your machine could dial
out and infect others, especially as you never have to shut down your Linux PC
(Just turn off the Screen). Not that viruses are a problem on Linux at the
moment, but you never know. So I prefer a manual connection before starting the
browser or my email client.
You can choose what suits your needs best.
If you don't have YaST you can use kppp to configure your connection. First
I'll show you the YaST method.
In the main menu choose System ? YaST. You have to be the super user to run
YaST and enter the root password. 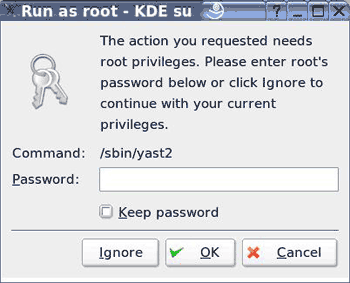
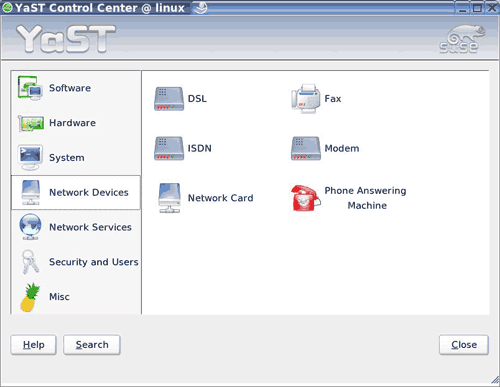
Choose Modem by clicking on it and see this window. 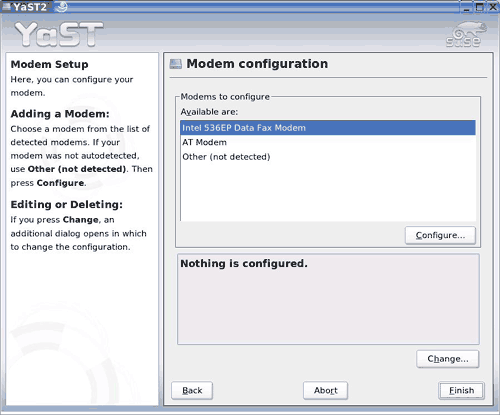
Hopefully you will just see AT Modem. I've got lots of test bits in my test
machine. Clicking on that one brings up this screen. 
This one is all OK so click next. 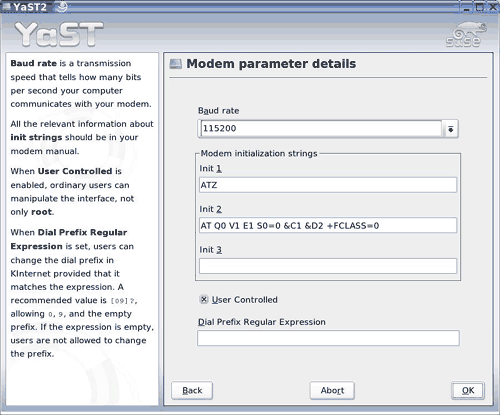
Notice the Baud rate. This is correct. It is normally set like this to twice
the modem speed. Click OK. 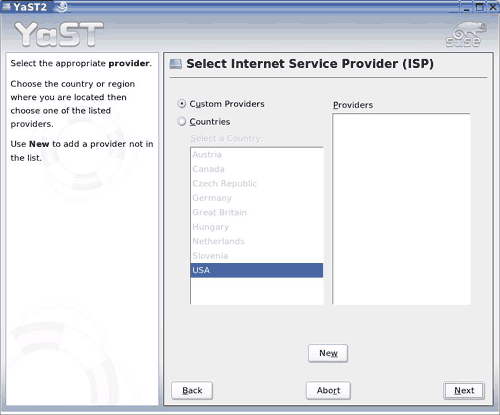
If you are in Australia like me, select Custom Providers and click the New
button. 
Fill in your Provider Name. This can be anything that tells you who it
is.
Fill in the phone number your ISP sent you.
Fill in the user name your ISP sent you.
Fill in the password your ISP sent you. It is secret so it is replaced by
stars. If you don't want others using your connection, click the Always Ask for
Password check box.
Click Next. 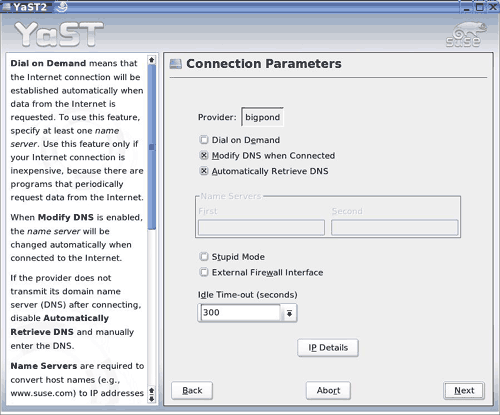
This is the screen where you can set up Dial on Demand. You have to know the
IP numbers of your ISP's name servers to be able to fill this in. You can find
this out later from the Internet and go back and reconfigure this when you've
got them, so leave this blank for now.
Stupid mode is useful if you have trouble getting connected. The external
firewall interface is also useful, but leave this blank for now, as the firewall
may stop you getting connected the first time. Once you have everything working
you can play with these settings.
Click Next. 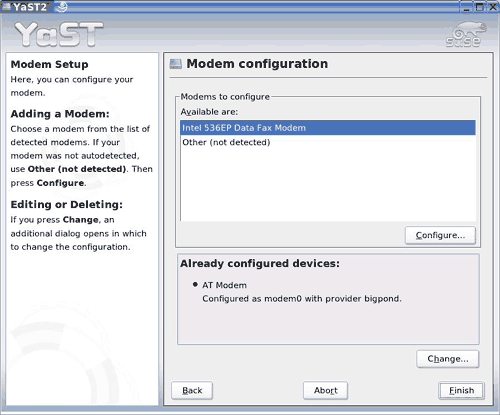
Now we are back to the beginning, but now we have a configured Modem. Click
Finish, there is still a way to go. 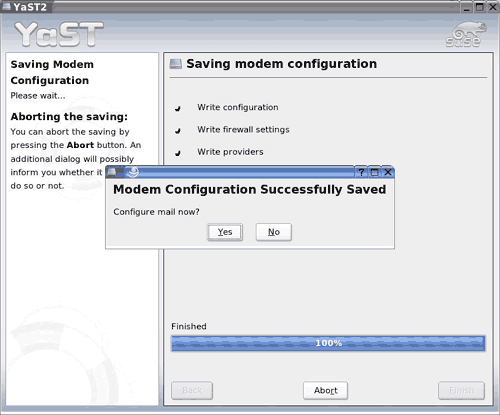
Click Yes to Configure your E-Mail interfaces. 
Click Next. 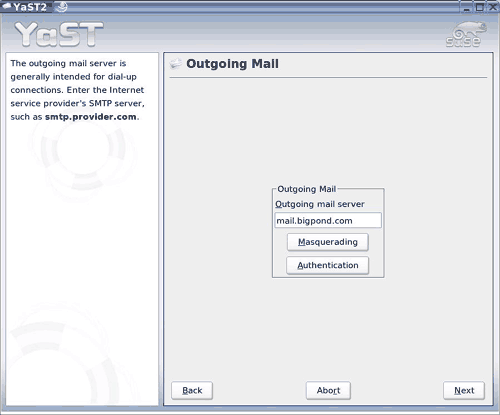
Fill in your outgoing Mail server name and click Next. 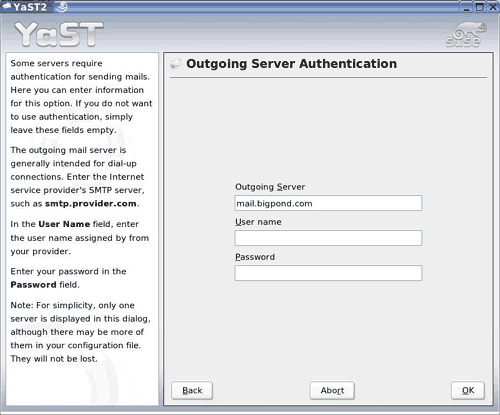
You probably won't need to fill this in. Most ISP's in Australia only need ID
when retrieving mail sent to you, so click OK. 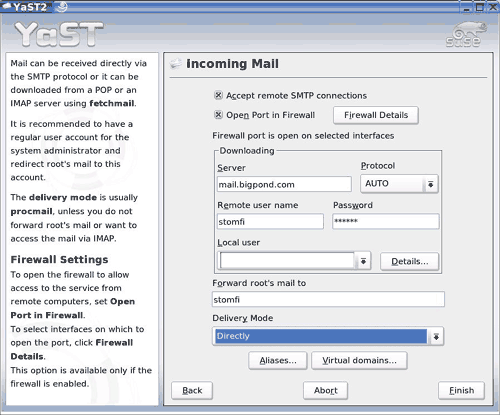
Fill this window in to get your mail. You will have to select the local user
which is your desktop login name and may not be the same name as your remote
name like me. For example, your remote user name could be "stomfi567" and your
desktop login name "tom".
When you have set this screen up correctly click Finish. 
Click Yes on this pop up.
When you have completed this step you can close the YaST window. A new panel
applet will appear to the right of the panel. This is the Plug icon. 
Right clicking the plug icon will display the kinternet menu. 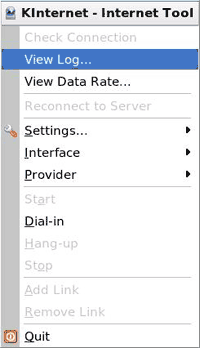
Click View Log, Right click on the icon again and click Dial-In.
The Log will show you the progress and any errors. Hopefully you set things
up OK and you will connect to the Internet. 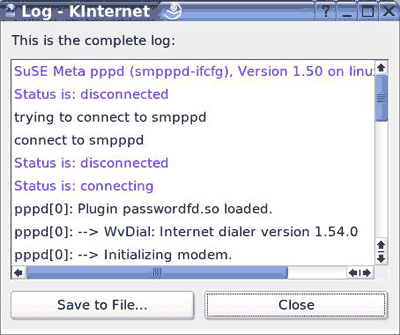
Once you are connected, start up your favourite browser and type in your
ISP's name. E.g. www.bigpond.com.
There should be an area where you login as a user.
Your E-Mail will also have been set up by YaST so you can open the default
email client and collect your mail. See below if you have trouble.
This is the end of the YaST section.
Setting up with kppp and Mozilla
Kppp needs to operate with the Set User ID bit (SUID bit) set. You can check
this is set by starting kppp. You should be able to find this program in the
menu under Internet. If it isn't there and you know you have got the KDE
programs loaded, start up a terminal and type the command:
$ whereis
kppp
This will tell you the path. It may be in /opt/kde3/bin or it may be in
/usr/bin.
If it is in /user/bin, you can start it with the command kppp, but if it is
in the /opt folder you will have to type the full path i.e. /opt/kde3/bin/kppp.
Depending on how your shell interface has been set up, this still may not work,
and you will have to start it from either the "Run Command" option in your menu,
or by creating a window icon. I've explained how to make window icons in several
of my How Tos, but you can discover the right click menu item by right clicking
on a blank piece of your screen.
When kppp starts you should see a window like this: 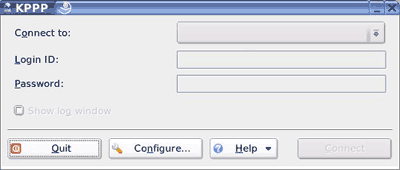
If you see a window like this instead, quit the following kppp window and
follow the following instructions. 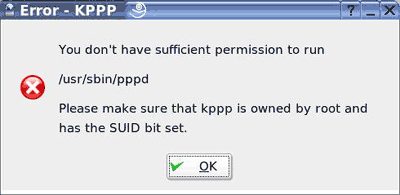
SUID instructions.
Start up a terminal. Type the command to become the super user, and the
password. Don't forget to press the Enter key at the end of each command to
activate it.
$ su -
Go to the folder that contains kppp by typing:
$ cd
/opt/kde3/bin/
or
$ cd /usr/bin
Type
$ mc
This starts the midnight commander terminal based file manager which looks
like this: 
I've used the down arrow key to high light kppp. Now either use your mouse to
click on File in the light blue bar at the top of the mc window, or press the F9
key and the right or left arrow key to activate the File menu.
This is what you will see: 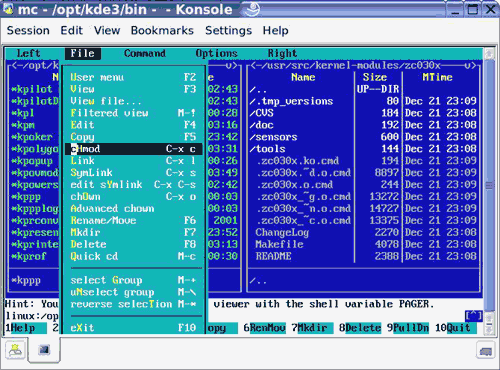
I've used the down arrow key to highlight Chmod, which is the shell tool we
use to set the permission bits of a file. Press Enter or click on this with the
mouse and this new window appears. 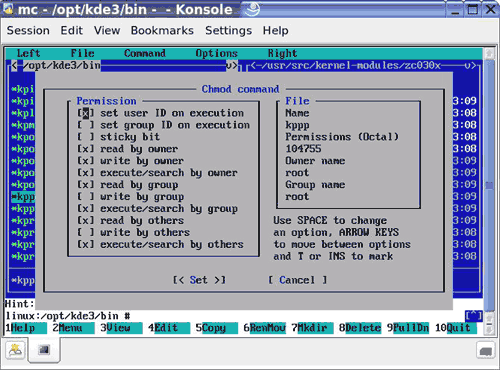
Use the mouse or the space bar to put a new x where it is in the picture, and
click or TAB to the Set operation. That's all you have to do, so press F10 to
quit mc, exit from the su mode and close the terminal. Now when you start kppp
it should start without the error message.
End of SUID instructions.
In the kppp window, click on Configure, and this window appears. 
Click on the new button to create a new account. 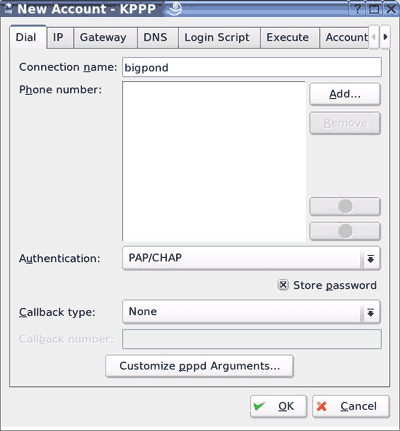
Enter a name for your ISP and click Add to enter the telephone
number. 
Add the phone number and click OK. Click on the DNS tab to display this
window. 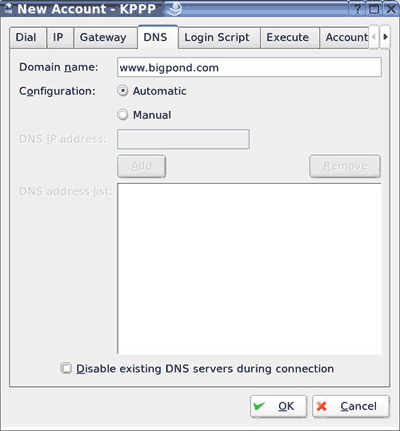
Fill in your ISP's web name. If you want to track your usage you can click
the Accounting tab and set it up like this. 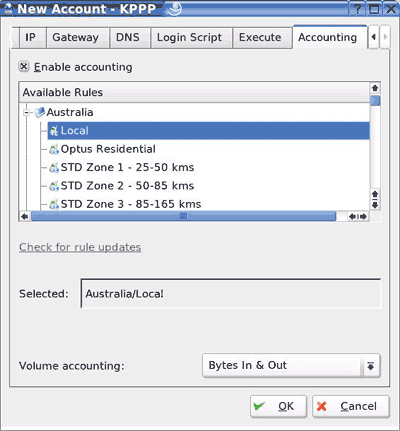
Click OK to save your new account information and return to the setup
window. 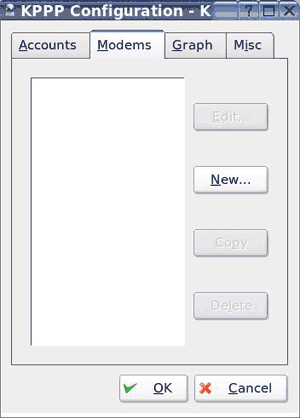
Click the Modems tab and click the New button. 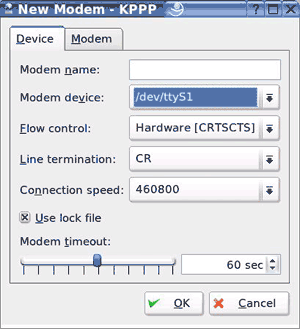
Add a modem name like 56K or anything you like. Where it says Modem Device,
it usually says /dev/modem.
It is more secure to use the actual device name which will be either
/dev/ttyS0 or /dev/ttyS1 depending which plug the cable is attached to. They
will be in the list when you click on the down symbol for the list. Try setting
the one you think it is first and click the Modem tab. You can go back and try
the other if you were wrong. 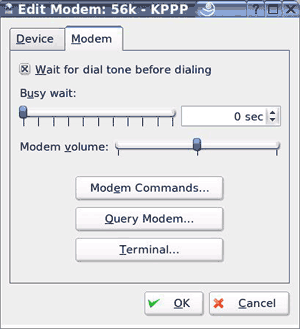
Click Query Modem to test your PC to Modem connection. If you got the device
right you will see something like this: 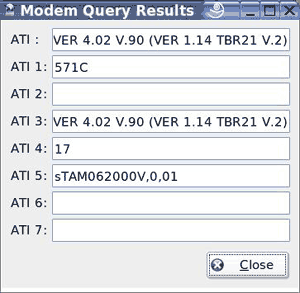
Close this window and have a look at the Modem Commands. 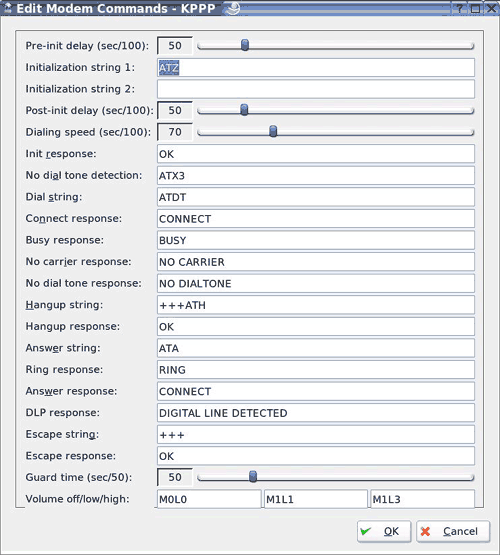
If you have a modem manual you'll find Initialization Strings 1 and 2 inside.
If you haven't got a manual leave things as they are for the first test. If it
doesn't work go back and change string 1 to AT&F which should load any
firmware.
Once you've connected to the Internet you can look for "modem initialization"
in Google to find out what these should be for your Modem make and model.
Click OK to get back to the Configuration window. 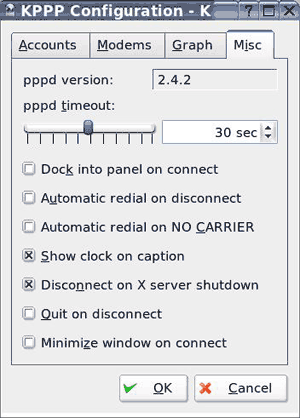
Click on the Misc tab and uncheck Minimize window on connect so the window
stays on the screen.
Click OK to get back to the first screen. 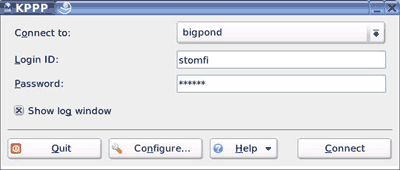
Fill in your user name and password and check the show log window box. This
will let you see what is going on when the modem tries to make the
connection.
Click to the Connect button and watch the log window. You should see the
connection take place if you set up everything correctly.
Open your browser and type in an address as previously described above.
Setting up your E-Mail account with Mozilla or Thunderbird.
Start Mozilla and choose Mail from the Tools men or start Thunderbird. As
this is the first time you used it, it will show the following window. This is
the Thunderbird window. 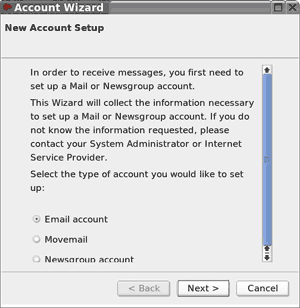
Check the Email Account and click Next. 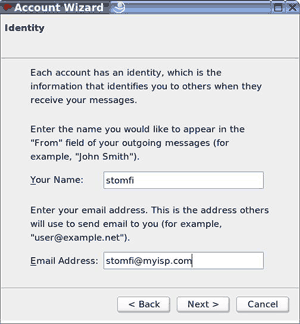
Fill in this form and click Next. 
Fill in this form and click Next. 

Accept the name or choose another you like and click Next. 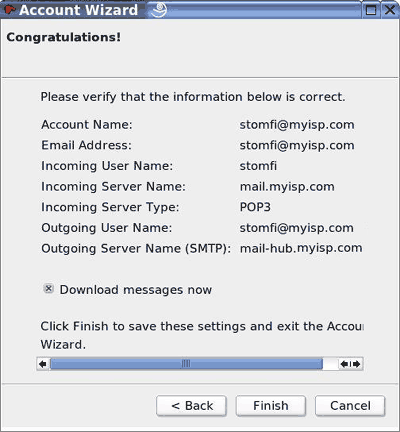
Click Finish to download any E-Mail. You probably have received a welcome
message from your ISP.
|