Posted: 16 Feb 2005
This tutorial will explain how to get edges off an image using The
Gimp.

With
your image loaded, you want to select the entire image by pressing CTRL-A. That
should add a running dotted-line around the edges of your image.
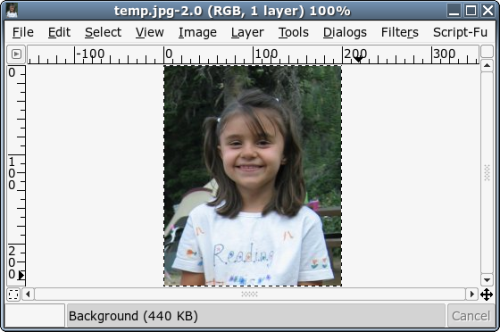
after
that, we'll want to round the corners. This can easily be done by using a
pre-written script-fu script called "Round".
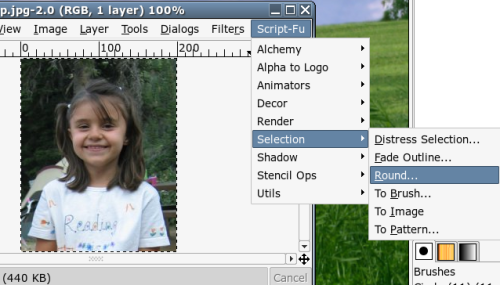
There
are many ways to get there. The easiest way for me, is to go to the top menu and
follow Script-Fu -> Selection -> Round.
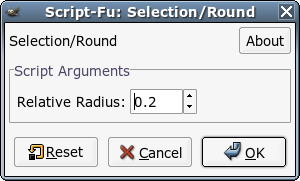
After that's done, you'll
want to enter the rounding value. For this image, 0.2 worked just
fine.
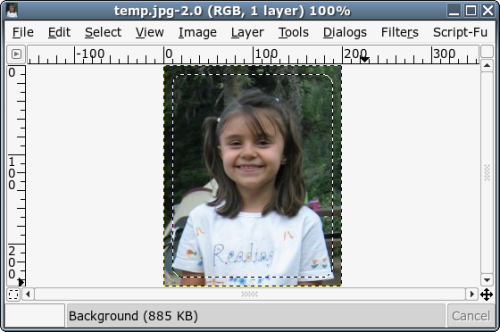
After
you press OK, you'll see the corners on your selection round themselves out.
It's kind of hard to see, so I put a red circle around the rounded part of the
selection in the upper left-hand corner of the image. All four corners of the
selection will show rounding.

Now
it's time to shrink the selection a bit. To do this, right click anywhere on
your image and follow the menu to Select -> Shrink.

For
this image, I chose 10.0 as the value. Yours may vary, depending on how you want
it to look.

After
you click OK, you'll see the selection shrink from the borders of your
image.
Now
we've got the rounded corners, but we want all the edges to have a nice faded
look to them. To accomplish this, we simply feather the selection by right
clicking on the image and following the menu to Select ->
Feather.

In
this case, it's probably a good idea to choose the same value you did to shrink
your image. I chose 10.0 to shrink, so I chose 10.0 to feather.

When
you click OK, you won't notice any difference on your image. This is normal.
What you'll want to do now is invert the selection by right clicking on the
image and following the menu to Select -> Invert.
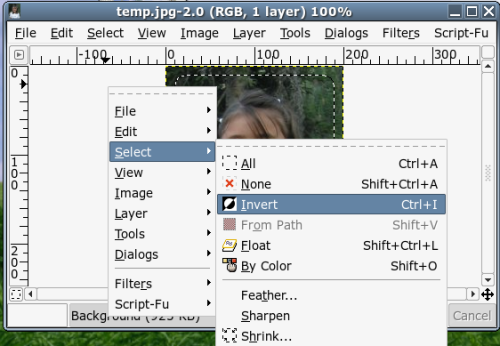
When
that is done, you'll notice the selection on your image has inverted itself.
What was previously selected, is now not selected, and vice-versa.
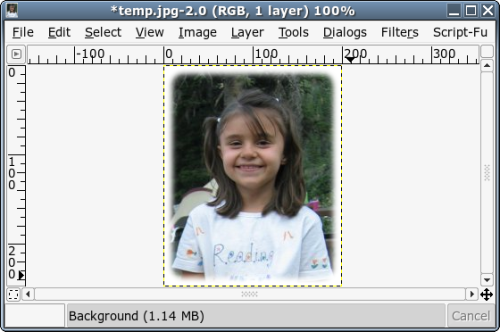
Now
you'll want to delete what is selected, so navigate to Edit -> Clear after
right-clicking on your image. (you can also press CTRL-K to do the same
thing)

As
soon as that is done, you'll have a nice image!
Feel
free to play with the different settings in the feather and round settings, to
come up with the perfect image.

|